Imagine you need to migrate a large production database to AWS with minimal downtime and zero data loss. AWS Database Migration Service (DMS) is built exactly for this. This article covers how DMS works and how to run a real migration, step by step.
Understanding AWS Database Migration Service
AWS DMS is a fully managed service that migrates databases to, from, or between AWS environments with minimal downtime. Your source database stays fully operational while it runs — applications keep serving users, and DMS captures every change in real time. It supports a wide range of relational and non-relational databases, including Oracle, SQL Server, PostgreSQL, MySQL, MariaDB, MongoDB, Amazon Aurora, Redshift, S3, and DynamoDB.
Core Components
Every DMS migration is built from four pieces.
The source endpoint stores the connection details DMS uses to read from your existing database — on-premises, EC2, RDS/Aurora, or another cloud. The target endpoint defines the destination — another RDS instance, an Aurora cluster, Redshift, S3, DynamoDB, or even another on-premises database.
The replication instance is the engine that does the actual work — under the hood an EC2 instance running DMS software, though you never manage it directly, just choose its size. It connects to both endpoints, extracts data from the source, applies any transformation rules, and loads it into the target.
The replication task ties everything together. It tells DMS which source and target endpoints to use, which migration mode to run (Full Load, CDC, or both), which tables or schemas to include or exclude, and what transformation rules to apply.
Homogeneous vs Heterogeneous Migrations
The first decision in any migration: are the source and target the same database engine, or different ones? That determines whether you need extra tooling.
Homogeneous migrations move data between the same engine — MySQL to MySQL, Oracle to Oracle, PostgreSQL to Aurora PostgreSQL. Since both databases speak the same language, DMS migrates data directly with no schema conversion needed.
Heterogeneous migrations move data between different engines — Oracle to Aurora PostgreSQL, SQL Server to MySQL, MongoDB to DocumentDB. Because the engines have different data types and syntax, the schema typically needs to be converted before DMS runs. This is where AWS Schema Conversion Tool (SCT) comes in.
| Homogeneous | Heterogeneous | |
|---|---|---|
| Schema Conversion | Not required | Required (AWS SCT) |
| Complexity | Low | High |
| DMS Task | Full Load + CDC | Full Load + CDC |
| Typical Use Case | Lift-and-shift | Modernization / re-platforming |
Behind the Scenes: How AWS DMS Moves Your Data
Here is how a DMS replication task actually moves and syncs your data.
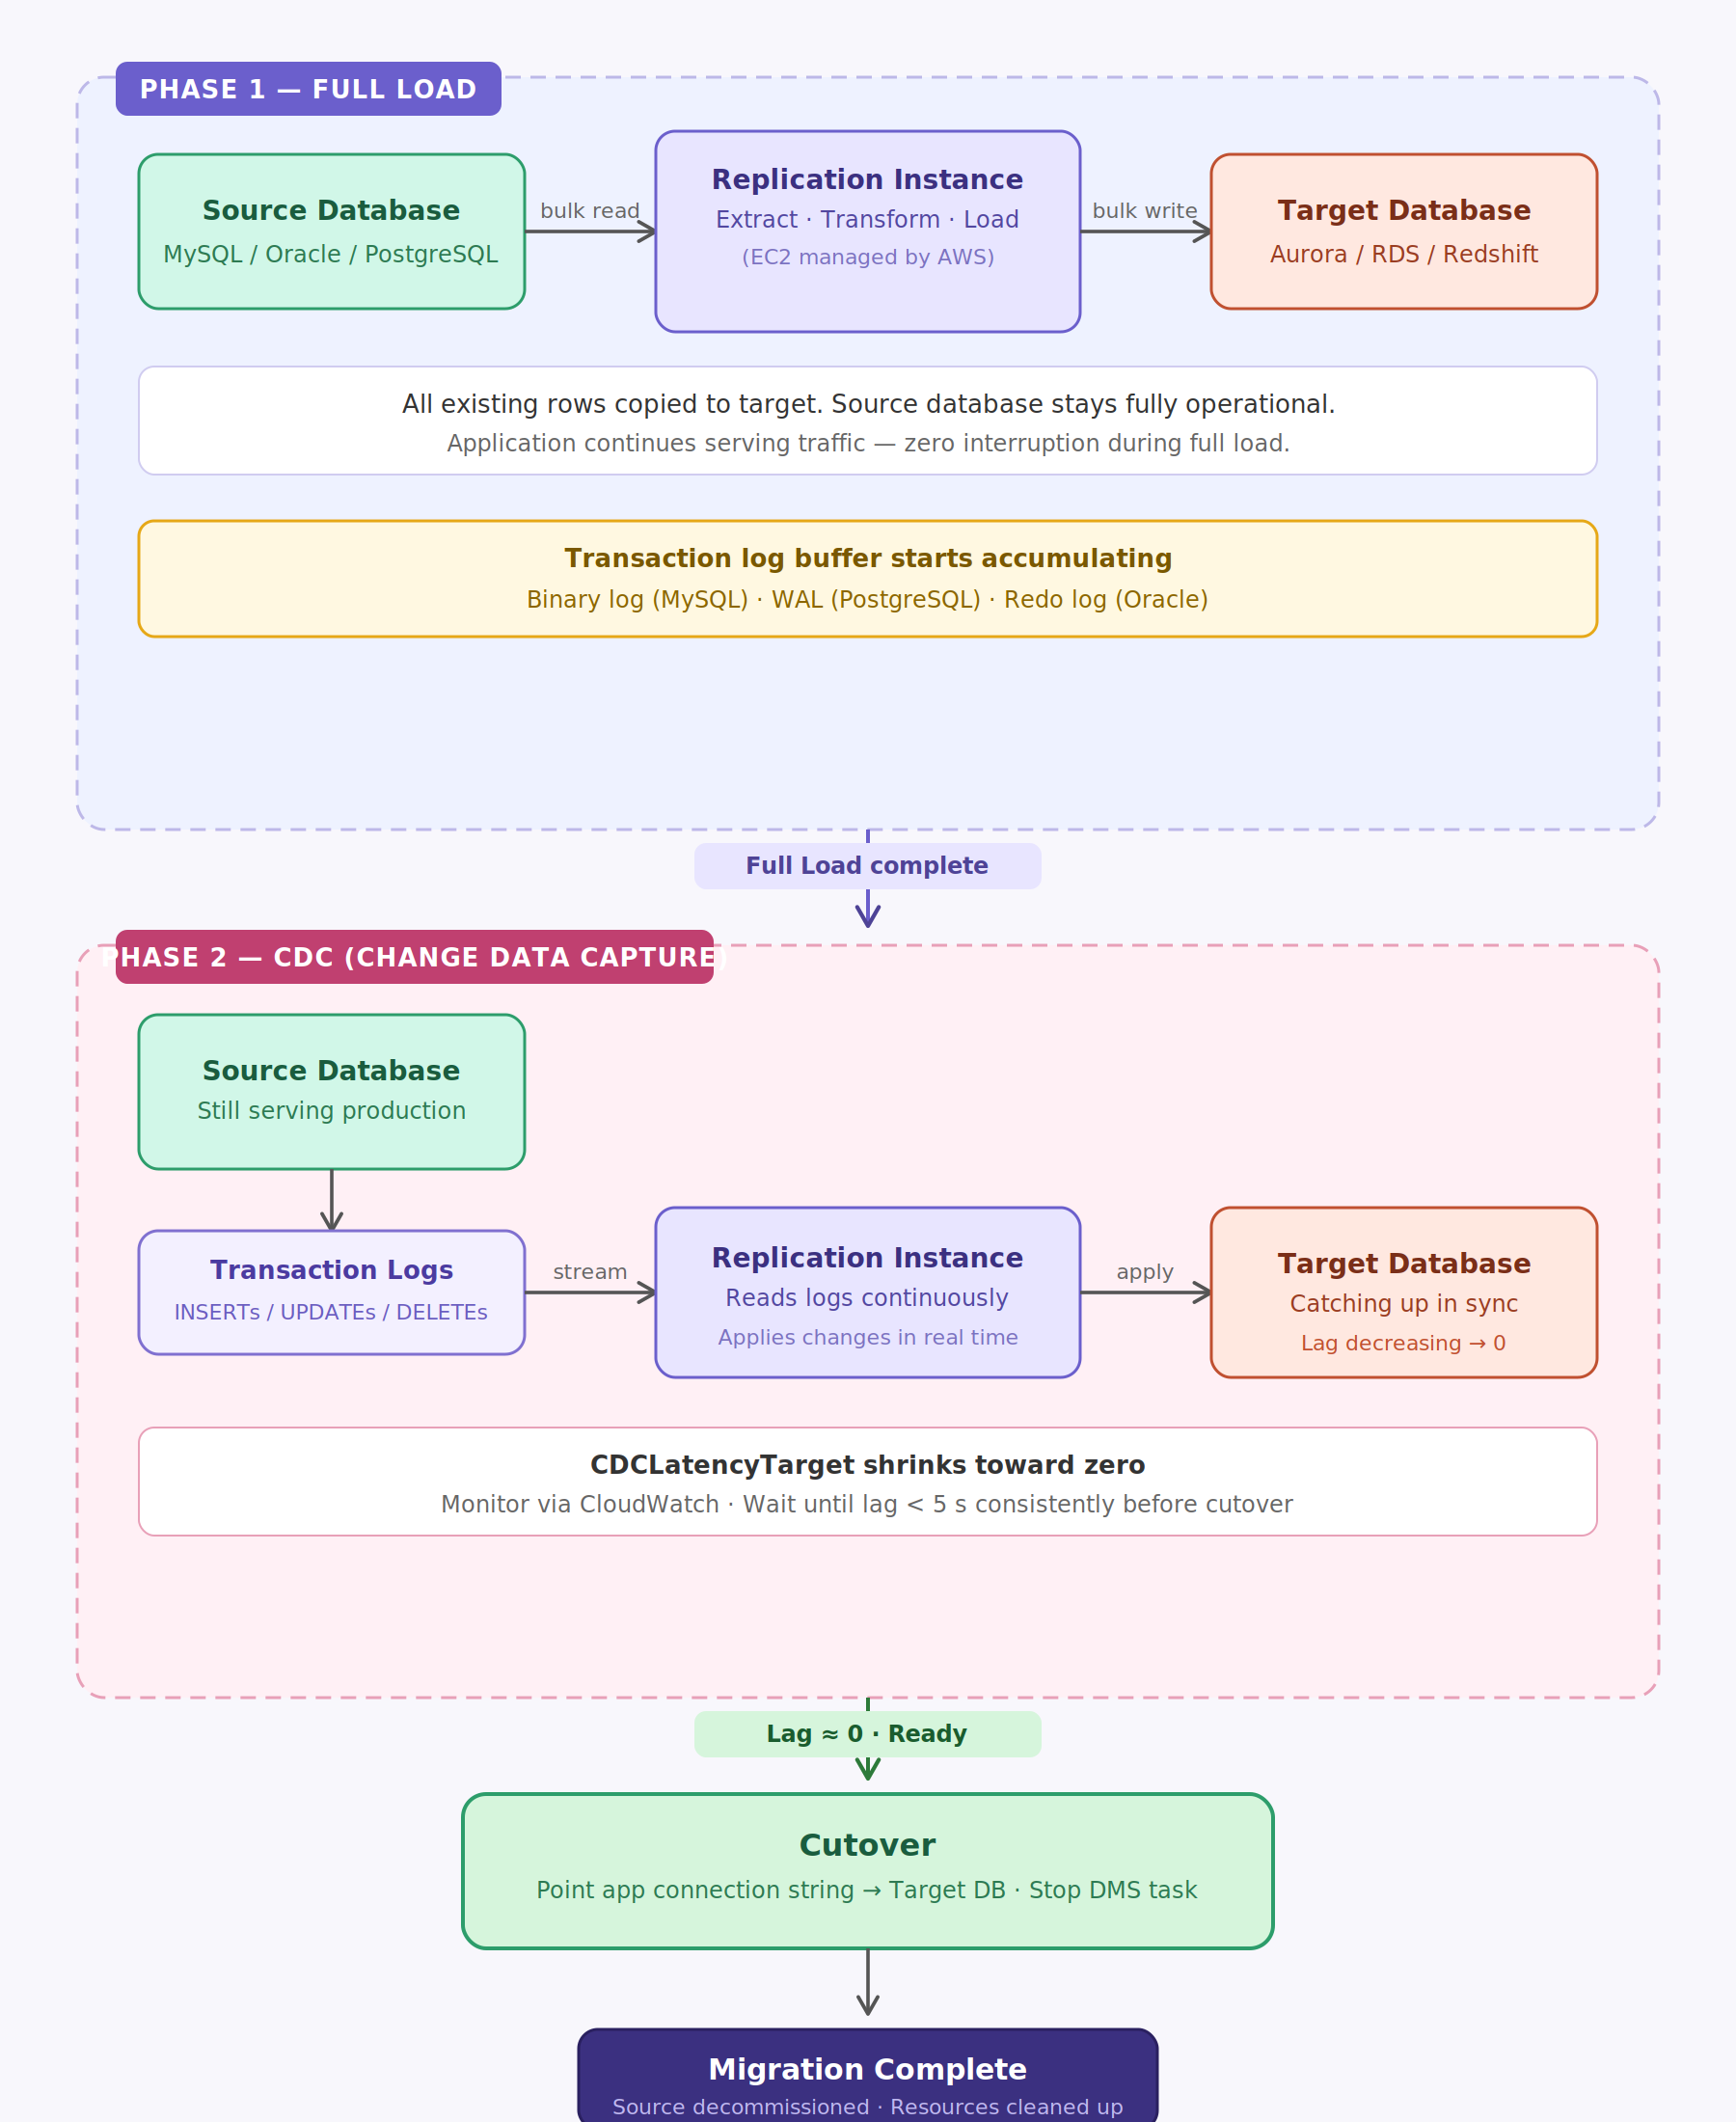
Phase 1: Full Load
DMS reads all existing data from the source and writes it to the target while the source keeps serving production traffic normally. At the same time, DMS starts buffering any changes that happen during the load — even though it hasn't applied them yet. The full load completes once all rows in every selected table have been written to the target.
Think of this as taking a snapshot and copying it.
Phase 2: Change Data Capture
Once Full Load finishes, DMS switches to Change Data Capture (CDC) mode, reading the source's transaction logs (binary log for MySQL, WAL for PostgreSQL, redo logs for Oracle) and applying every change to the target in near real time.
This is how DMS achieves near-zero downtime. As CDC runs, the lag shrinks toward zero, and once it's negligible, you cut over by redirecting your application to the target.
Transformation Rules and Data Validation
You can add transformation rules to a replication task to rename tables or schemas, drop specific columns, change data types, or filter rows — configured as JSON, no custom code needed. DMS can also run a validation check after migration, comparing row counts and data values between source and target, flagging mismatches so you can re-sync before cutover.
The Scenario We Will Work Through
Consider you have a production MySQL 8.0 database running on Amazon RDS. You want to migrate it to Amazon Aurora PostgreSQL with minimal downtime. Since the source and target are different database engines, this is a heterogeneous migration.
Here is the step-by-step process.
Step 1: Create the Source Database
For this experiment, create an AWS RDS MySQL database with the following specification:
- Database engine: MySQL 8.4.8
- Creation method: Standard create
- Templates: Dev/Test
- Availability: Single AZ (Multi-AZ recommended for production)
- VPC and Subnet: Create a dedicated VPC
- Public access: Enabled (for this experiment only)
- Security group: Inbound MySQL port 3306 allowed
Step 2: Prepare the Source Database
CDC isn't a feature you simply turn on inside DMS. It depends on the source database exposing changes through binary logs. Without the right MySQL configuration, DMS can only perform a one-time migration.
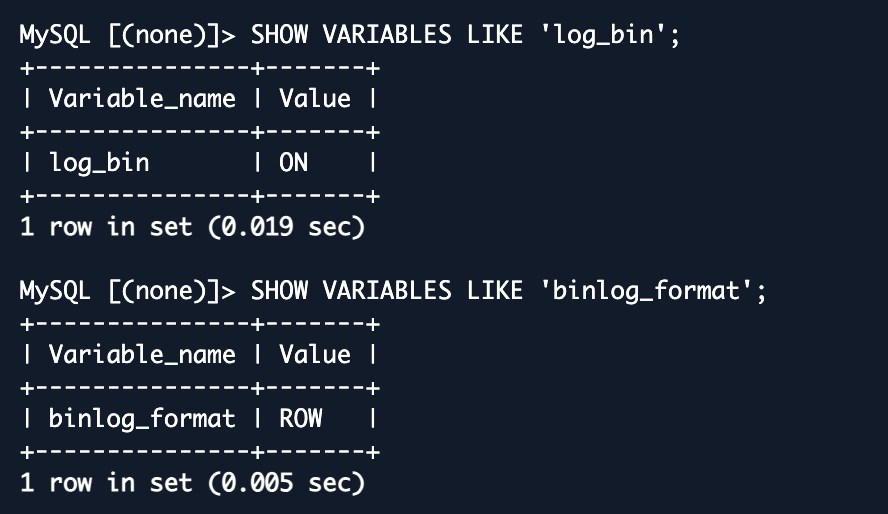
If you are using Amazon RDS MySQL, binary logging is enabled by default. For on-premises or self-managed MySQL, verify binary logging and confirm the format is set to ROW — AWS DMS relies on row-level events for accurate replication.
SHOW VARIABLES LIKE 'log_bin';SHOW VARIABLES LIKE 'binlog_format';
RDS automatically purges binary logs after a period. Verify the retention period is at least 24 hours:
CALL mysql.rds_show_configuration;
If the binlog retention hours value is NULL, update it:
CALL mysql.rds_set_configuration('binlog retention hours', 24);

Now create a dedicated replication user instead of using the master or root user:
CREATE USER 'dms_user'@'%' IDENTIFIED BY 'enter_some_password';GRANT SELECT, RELOAD, REPLICATION CLIENT, REPLICATION SLAVEON *.* TO 'dms_user'@'%';FLUSH PRIVILEGES;
Verify the permissions:
SHOW GRANTS FOR 'dms_user'@'%';

Step 3: Create the Target Database — Aurora PostgreSQL
Create an Amazon Aurora PostgreSQL cluster with the following configuration:
- Database engine: Aurora PostgreSQL
- Templates: Dev/Test
- Multi-AZ: No (enable for production)
- Public access: Enabled
- VPC: Same VPC as the RDS MySQL source
- Security group: Allow inbound port 5432
- Database name: shopwave
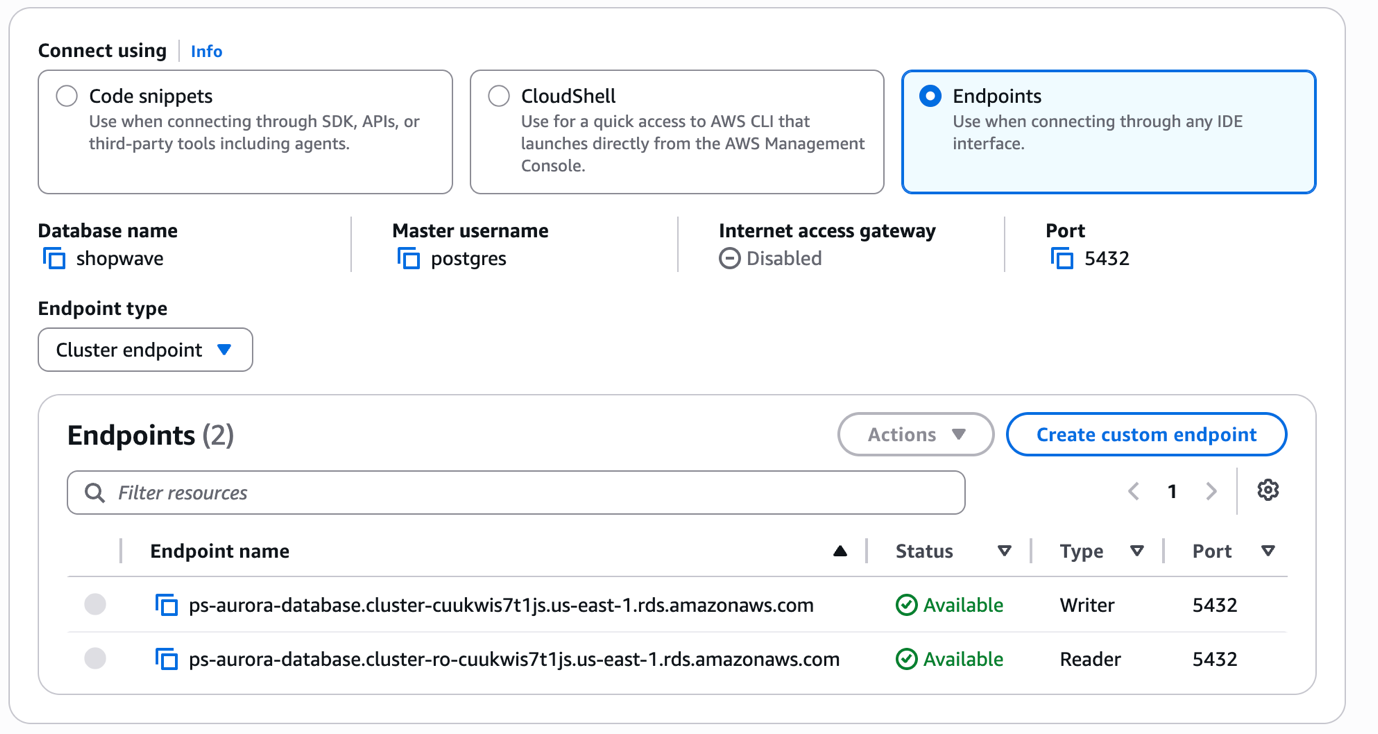
Once the Aurora cluster is up, note down the Writer endpoint from the RDS Console — you'll need it when creating the target endpoint in DMS.
shopwave.cluster-xxxxxxxx.ap-south-1.rds.amazonaws.com
Step 4: Schema Conversion — Do You Always Need AWS SCT?
Since we're migrating RDS MySQL to Aurora PostgreSQL, this is a heterogeneous migration. Conventional guidance says to run AWS Schema Conversion Tool (SCT) first. However, in this experiment the migration succeeded without SCT: DMS has a built-in behavior where Full Load auto-creates basic tables and primary keys on the target if they don't already exist.
4.1 Download and Install AWS SCT
AWS SCT is a free desktop application. Download it for your OS from the AWS documentation page (requires Java 11+).
4.2 Create a New Project and Connect to Source
In SCT, go to File → New Project. Set the source engine to MySQL and target engine to Amazon Aurora (PostgreSQL compatible). Click OK.
Then click Add source and enter your RDS MySQL connection details — server name (RDS endpoint), port 3306, username dms_user, and database shopwave. Click Test connection then Connect.
4.3 Connect to the Target
Click Add target and enter your Aurora PostgreSQL connection details — server name (Aurora Writer endpoint), port 5432, admin username and password, database name shopwave. Test and connect.
4.4 Run the Assessment Report
Right-click the shopwave schema and click Create Report. SCT analyzes every object and shows what it can convert automatically versus what needs manual work. This report is especially valuable for production databases.
4.5 Convert Schema and Apply to Aurora PostgreSQL
Right-click the shopwave schema and click Convert Schema. SCT translates all MySQL DDL into PostgreSQL-compatible syntax.
Once complete, right-click the converted schema in the right panel and click Apply to database. SCT creates all tables with the correct data types, primary keys, indexes, and foreign key constraints.
4.6 Verify the Empty Tables
After applying the schema, confirm tables exist before starting the DMS task:
SELECT table_nameFROM information_schema.tablesWHERE table_schema = 'shopwave';
You should see all five tables listed with zero rows — the schema is ready for DMS.
Step 5: Create a Replication Subnet Group
Before launching a replication instance, DMS needs to know which VPC subnets it can use.
Navigate to AWS DMS Console → Subnet groups → Create subnet group and fill in:
- Name: shopwave-dms-subnet
- Description: DMS subnet group for shopwave migration
- VPC: Same VPC used for RDS MySQL and Aurora PostgreSQL
- Subnets: Add at least two subnets from different Availability Zones

Step 6: Create the Replication Instance
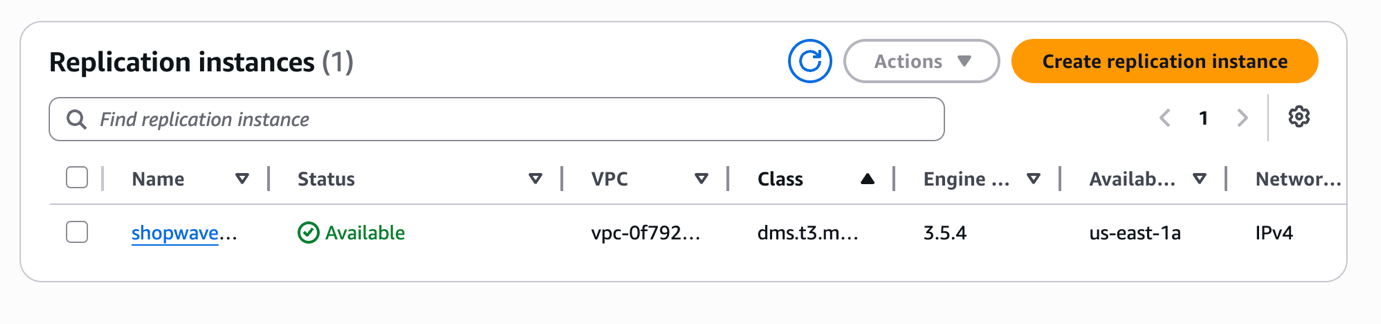
In the DMS Console, go to Replication instances → Create replication instance with these settings:
- Name: shopwave-rep-instance
- Instance class:
dms.t3.medium(usedms.r5.largeor higher for production) - Engine version: Latest available
- Multi-AZ: Single-AZ for this lab (enable for production)
- VPC: Same VPC as source and target
- Subnet group: shopwave-dms-subnet
- Publicly accessible: No
Wait until the status changes to Available before moving on.
Step 7: Create the Source Endpoint
Go to Endpoints → Create endpoint and fill in:
- Endpoint type: Source endpoint
- Endpoint identifier: shopwave-mysql-source
- Source engine: MySQL
- Server name: Your RDS MySQL endpoint
- Port: 3306
- Username: dms_user
- Password: The password you set for dms_user
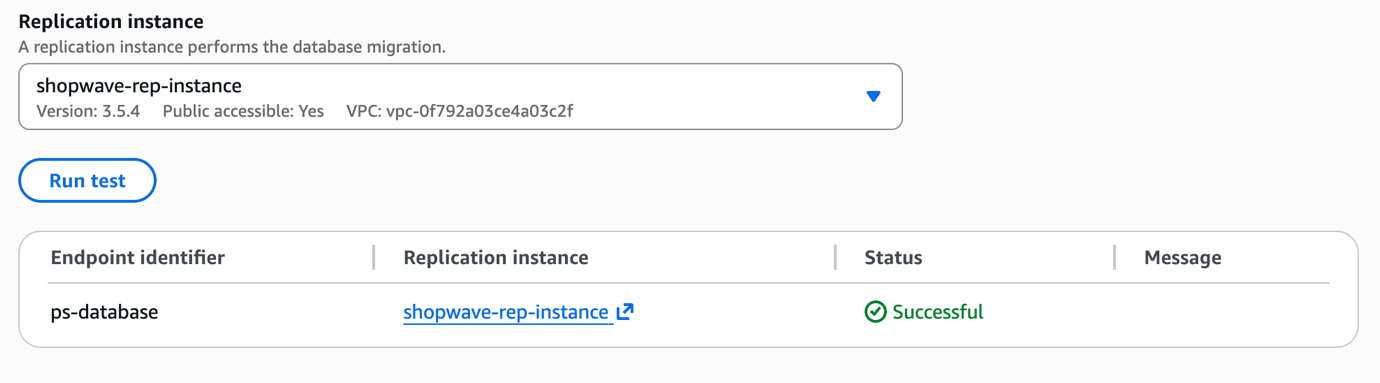
Scroll down and click Test endpoint connection. Select your replication instance and click Run test. Confirm you see a Successful result before saving.
Step 8: Create the Target Endpoint
Repeat the process for the Aurora PostgreSQL cluster:
- Endpoint type: Target endpoint
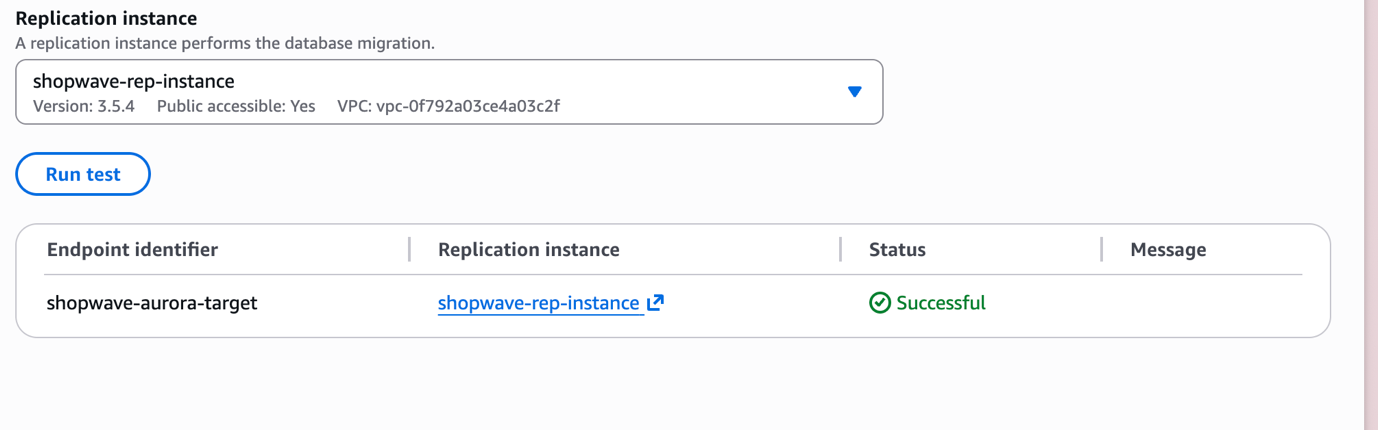
- Endpoint identifier: shopwave-aurora-target
- Target engine: Amazon Aurora PostgreSQL
- Server name: Your Aurora cluster Writer endpoint
- Port: 5432
- Username: Your Aurora admin username
- Database name: shopwave
Run the endpoint connection test and confirm it shows Successful before saving.
Step 9: Create and Run the Migration Task
Go to Database migration tasks → Create task.
Task Configuration:
- Task identifier: shopwave-migration-task
- Replication instance: shopwave-rep-instance
- Source endpoint: shopwave-mysql-source
- Target endpoint: shopwave-aurora-target
- Migration type: Migrate existing data and replicate ongoing changes (Full Load + CDC)
Table Mapping — switch to JSON editor and paste:
{"rules": [{"rule-type": "selection","rule-id": "1","rule-name": "include-shopwave","object-locator": {"schema-name": "shopwave","table-name": "%"},"rule-action": "include"}]}
Task Settings — enable both of these:
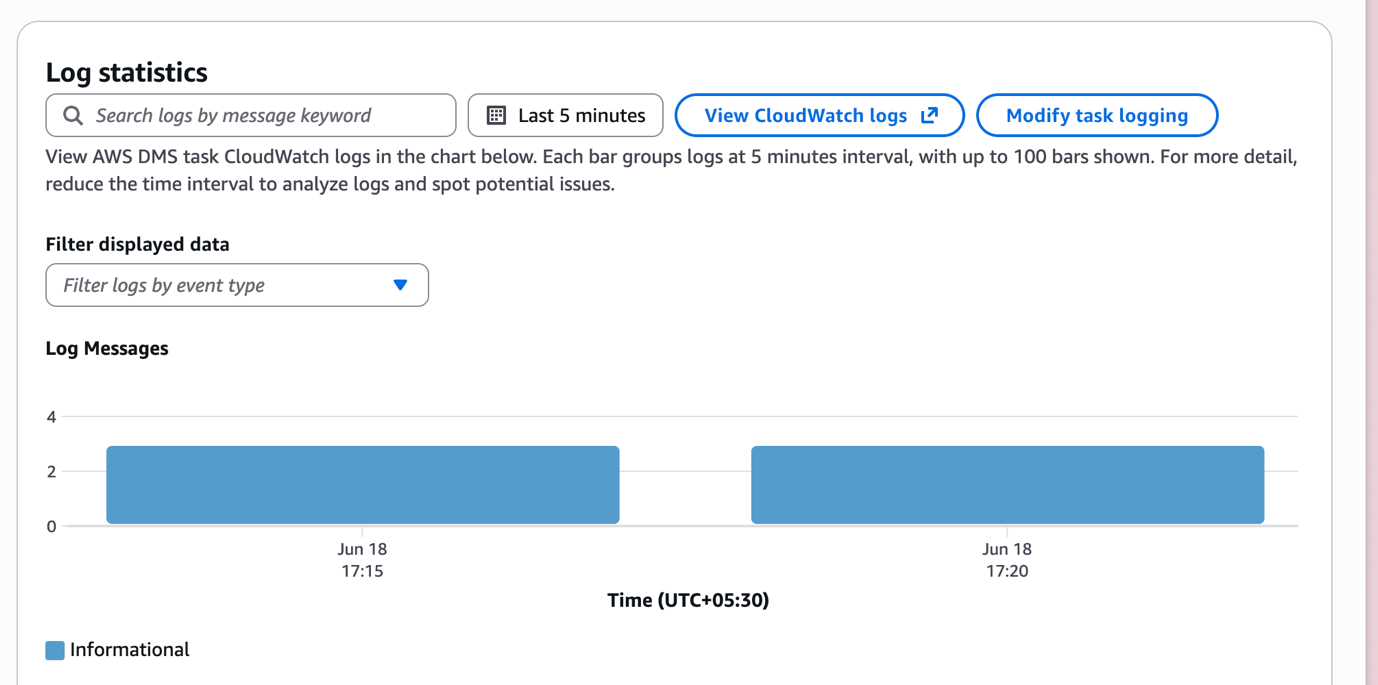
Enable CloudWatch logs — critical for debugging if anything goes wrong. Set log level to DEFAULT for now.
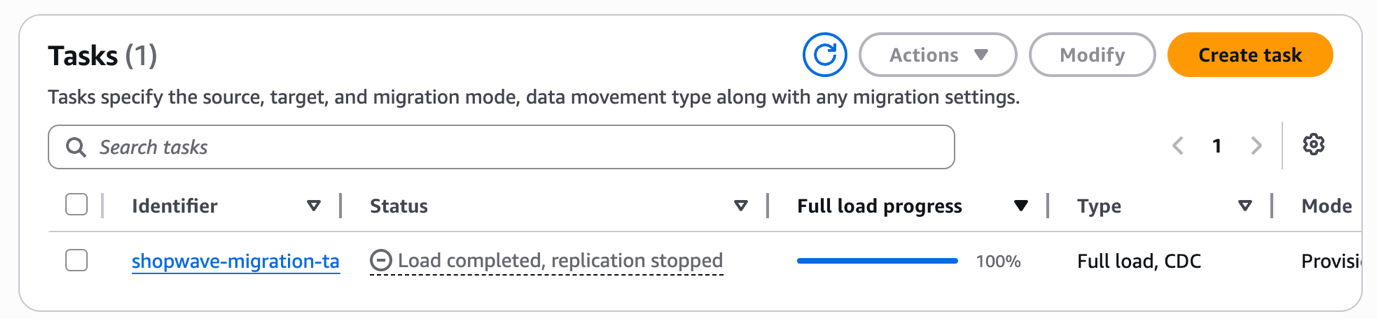
Click Create task. DMS starts the Full Load phase immediately. Watch progress in real time under the Table statistics tab.
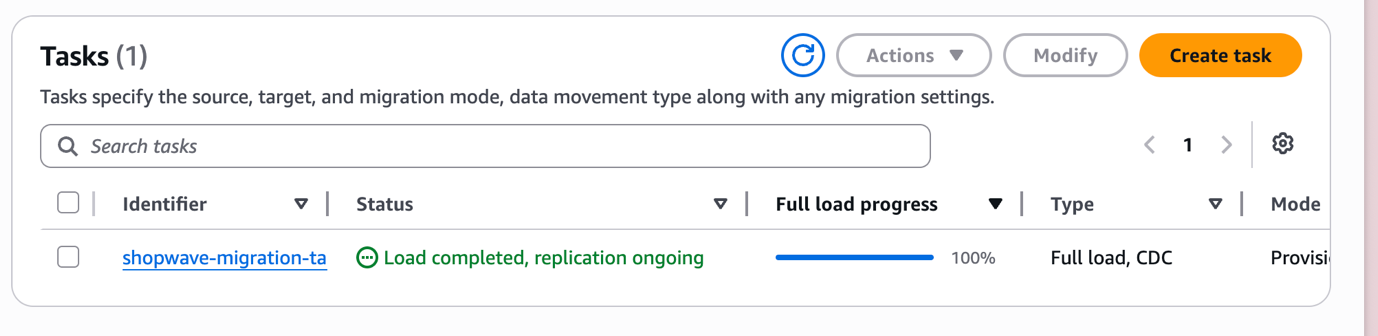
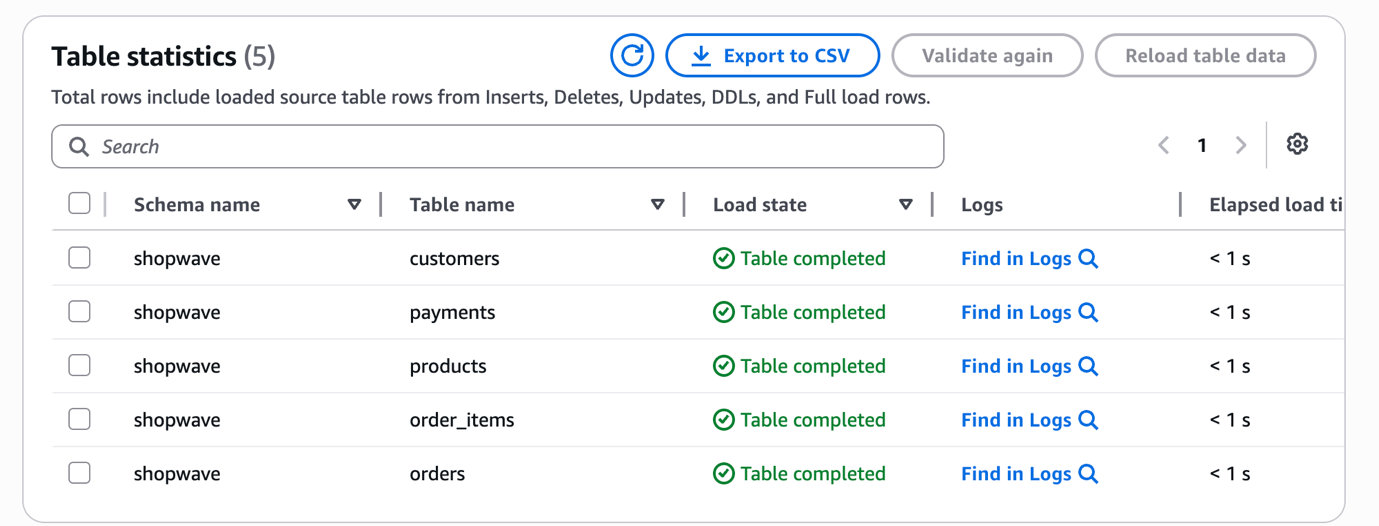
Step 10: Monitor the Migration and Verify Data
Once the full load is done, the task automatically switches to CDC mode.
Monitor CDC Lag in CloudWatch
Open CloudWatch → Metrics → AWS/DMS and watch two key metrics on your task:
- CDCLatencySource — lag between the source writing a change and DMS picking it up from the transaction log
- CDCLatencyTarget — lag between DMS reading a change and it landing in the target
Verify the Data in Aurora PostgreSQL
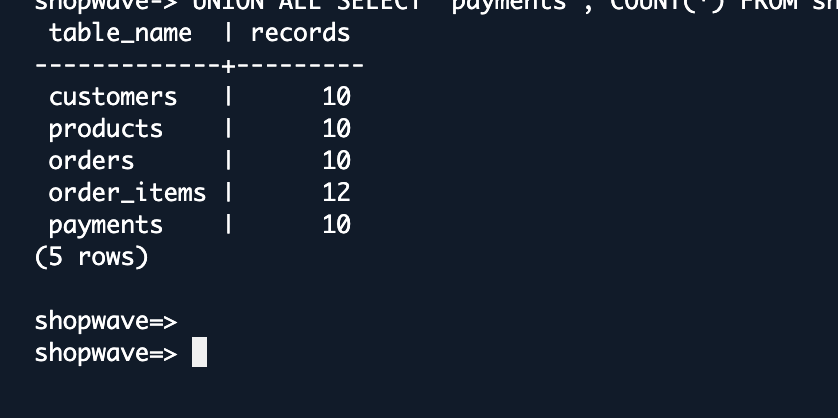
Connect to Aurora PostgreSQL and run this verification query — row counts should match the source:
SELECT 'customers' AS table_name, COUNT(*) AS records FROM shopwave.customersUNION ALL SELECT 'products', COUNT(*) FROM shopwave.productsUNION ALL SELECT 'orders', COUNT(*) FROM shopwave.ordersUNION ALL SELECT 'order_items',COUNT(*) FROM shopwave.order_itemsUNION ALL SELECT 'payments', COUNT(*) FROM shopwave.payments;
Expected output: customers — 10, products — 10, orders — 10, order_items — 12, payments — 10.
Step 11: Cutover and Clean Up
This is the final step — switching production traffic to Aurora PostgreSQL. Follow this order carefully.
Cutover Checklist
- Confirm CDCLatencyTarget is below 5 seconds and has been stable for at least 5 minutes
- Confirm the data validation report shows no mismatches
- Run verification queries on Aurora and confirm row counts match
- Put the source MySQL database in read-only mode:
FLUSH TABLES WITH READ LOCK;
- Wait 10–15 seconds for DMS to drain any buffered changes to Aurora
- Update your application's database connection string to point to the Aurora Writer endpoint
- Restart your application and confirm it is reading and writing to Aurora correctly
- Stop the DMS replication task from the DMS Console
Clean Up Resources
Once Aurora is confirmed working, delete DMS resources in this order to avoid charges:
- Migration task
- Both endpoints
- Replication instance
- Subnet group
Then stop or delete the old MySQL RDS instance.
Wrapping Up
You just completed a full end-to-end database migration using AWS DMS — from RDS MySQL to Amazon Aurora PostgreSQL, with near-zero downtime.
AWS DMS removes most of the risk and manual effort from database migration. Once you've done it with a small dataset like shopwave, you have a repeatable playbook for any production workload.
Remember: prepare your source first, right-size your replication instance, test both endpoints, and never cut over until the lag is near zero.